Worktrees & Sessions
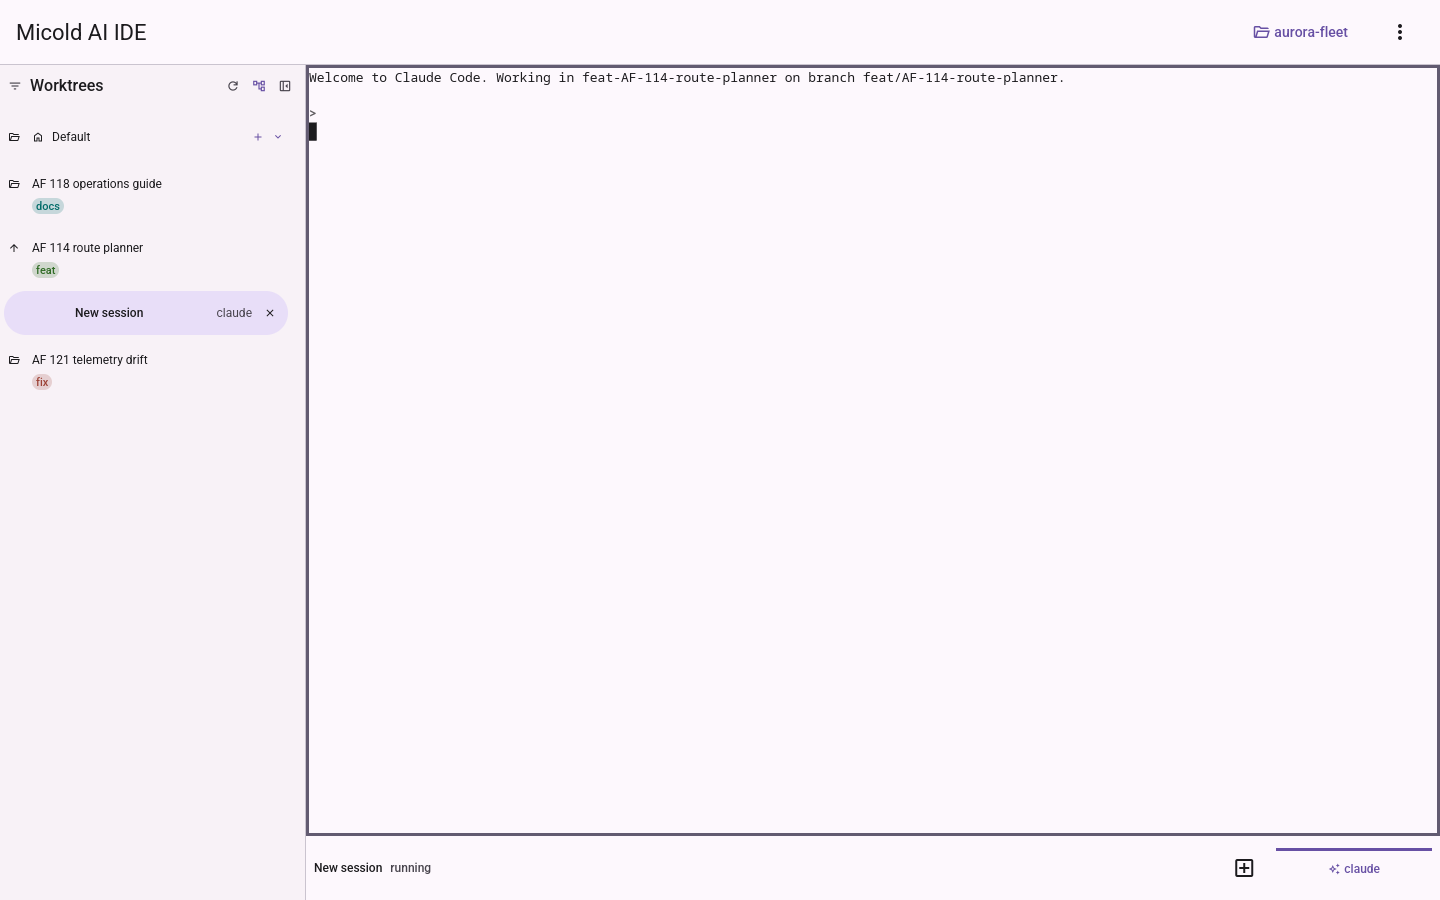
Micold AI IDE organizes your work into worktrees (isolated git branches checked out under your project) and sessions (interactive AI CLI runs inside a worktree). The left sidebar shows worktrees at the top level and their sessions as sub-items; the right side hosts the embedded terminal for the active session. The sidebar also always shows one Default entry — a session location that isn’t a worktree at all, for work you don’t want to isolate onto its own branch (see The “Default” entry below).
Opening a project (git repositories only)
Open a project with Open a project (empty state) or Open another project (app bar), then choose a folder.
- Only git repositories can be opened as projects. If you choose a folder that is not a git repository, opening is refused with a message and nothing is opened.
- Once opened, the project becomes the active context and the sidebar lists its worktrees.
Browsing worktrees
- Worktrees discovered under
.claude/worktrees/appear as top-level items in the sidebar. - Expand a worktree (the leading toggle) to reveal its sessions.
- A worktree whose directory was deleted outside the app, or that is not a valid git worktree, shows its name in the error color with a missing or invalid status tag — you cannot start new sessions on it until it is resolved.
Refreshing the list
The sidebar’s worktree list is not live. It is rebuilt when you open or switch to a project, and
after this app itself creates, deletes, renames, includes or excludes a worktree — but nothing is
watching the repository. So a worktree that appears by any other route is invisible until one of
those moments comes round again: one you created with git worktree add in a terminal, one a
coding agent made for its own work, or one you removed by hand.
Click the refresh button in the sidebar header — between the “Worktrees” title and add worktree — to re-read the list right now. Whatever git and the filesystem currently report is what you get: worktrees that appeared are added, ones that are gone are removed, and a branch that changed is shown as it now is.
Switching away from the project and back used to be the only way to force this, and it no longer is. Nothing else about your view changes: the rows you had expanded stay expanded, your tag filters stay applied, and the session you are working in keeps running.
While the re-read is running the button dims and stops responding, and its hover label reads “Refreshing worktrees…” — pressing it again does nothing, because one refresh is already on its way. When the answer arrives you get a short “Worktree list refreshed.” notice. That notice is the point of the whole exchange on a project where nothing has changed: most refreshes find nothing, and without it a button that correctly did its job would be indistinguishable from one that ignored you.
If the re-read cannot be done — the project folder has been moved or deleted, git cannot read the repository, or the session service is not running — you get a notice saying why, and the list you were already looking at stays on screen. A failed refresh never empties the sidebar. The button returns to normal either way, so you can fix the problem and press it again. In the rare case where no answer comes back at all, it gives up after about half a minute rather than staying dimmed.
The button re-reads the list once, and that is all it does: it starts no timer, installs no watcher, and changes nothing about the list’s behaviour afterwards. The list is still not live, and it never re-reads itself in the background — on demand means on demand. If you want to know whether something changed, press it.
Reading a worktree: name & tags
Each worktree is shown as a clean, human-friendly name on the first line, with small color-coded tags beneath it:
- A type tag — the Conventional-Commits type from the worktree’s branch (
feat,fix,chore,docs,refactor,test,build,ci,perf,style). Each type has its own fixed color, so you can recognize what a worktree is for at a glance. - An issue tag — the ticket you entered when you created the worktree. A Jira-style key is
shown upper-cased (
ABC-123); a GitHub or GitLab issue number is shown as#123. - A status tag —
missingorinvalidfor a worktree that is not usable (see above).
The name is derived from the descriptive part of the worktree’s folder: feat-abc-123_login-page
shows as Login page with feat and ABC-123 tags. The tags are display-only — the underlying
branch and directory names are unchanged, and a worktree that does not follow the naming convention
simply shows no type tag.
The _ is what separates the ticket from the description, so the app never has to guess where one
ends. A name without one has no ticket, which is exactly right for something like
feat-reporting-2 — the trailing 2 is part of the name, not an issue number. Two consequences
worth knowing:
- Worktrees created before this rule existed have no
_, so their issue tag is gone. Their names read correctly, and you can always rename one. - A branch from elsewhere that uses
snake_caseis read as having a ticket:fix/some_bugshows as Bug with aSOMEtag. The separator means one thing everywhere, and nothing can tell a stray underscore from a deliberate one. Rename the worktree if it bothers you.
The sidebar is intentionally compact — tight left/right padding and a slightly smaller font — so long names and their tags get as much width as possible. It stays legible in both light and dark themes.
Filtering worktrees by tag
Tap the filter button in the sidebar header to reveal the tag-filter panel — it’s hidden by default so the list has the full sidebar to itself until you need it:
- Tap a type chip (e.g.
fix) to show only worktrees of that type. - Tap issue to show only worktrees that have a Jira key.
- Tap untyped to show worktrees that do not follow the naming convention.
- Multiple filters combine with OR — tapping
featandfixshows both. - Clear filters restores the full list in one tap. If a filter matches nothing, an empty message with a clear action is shown.
Only chips for tags actually present in your worktrees are offered. Close the panel by
clicking outside it, pressing Esc, or tapping the filter button again — any active filter
stays applied either way. Whenever a filter is active, the filter button itself stays tinted
so you can tell filtering is on even with the panel closed.
One exception, and only one. The worktree holding your current session stays listed even when your filters exclude it — including when it’s an agent worktree you have hidden. It sits where it would sit unfiltered, and carries a current session chip saying why it’s there, so a row that survived a filter it doesn’t match is never unexplained. Every other excluded worktree stays hidden, and the exception disappears as soon as you move to a session somewhere your filters do allow. Adding it changes nothing about the filter chips on offer.
Agent worktrees
AI coding assistants create worktrees of their own inside your project, in the same
.claude/worktrees/ folder the app manages. Some are throwaway scratch worktrees for a background
sub-task, with machine-generated names like agent-a885b42dc521fbda1. Others are ordinary session
worktrees the assistant made because you asked it to work on something, and those carry perfectly
normal names — fix-the-parser, try-the-new-api — indistinguishable from anything you would type
yourself.
The app lists the worktrees it created for you, and hides the rest. When you add a worktree
here, the app writes down that it made it, and that note is what puts it in the sidebar. A worktree
that turns up in the managed folder without one — because an assistant made it, or because you
created it by hand with git worktree add — is hidden. Hidden worktrees aren’t counted and never
appear as somewhere you can start a session.
This is why a worktree’s name no longer decides anything. Naming one agent-something doesn’t
hide it if you made it here, and giving one an ordinary name doesn’t reveal it if you didn’t.
Hiding is display-only. The app never deletes, prunes, renames, or otherwise modifies a hidden
worktree or its branch — that lifecycle belongs to whoever created it. git worktree list in a
terminal still shows everything.
To see them in the app, open the filter panel and tap Show agent worktrees. They join the
list, each marked with a muted agent chip so you can always tell them apart from your own work.
Tag filters apply to them exactly as they do to everything else.
The number beside the switch is how many worktrees it is currently withholding — exactly the number of rows that appear when you turn it on. It counts only worktrees in the managed folder that the app has no note for; worktrees you keep elsewhere are never hidden and never counted. When there is nothing to reveal the number is absent rather than zero, and once the switch is on it disappears, because at that point nothing is being held back.
Two things to know about that switch:
- It resets itself — every time you restart the app, and every time you switch projects. It applies only to the project you turned it on for, so you never land somewhere new with unexplained extra rows.
- Revealed rows are fully live: you can start a session in one, rename it, or delete it, with the same confirmation as any other worktree. There is no extra safety net, so take care — deleting a worktree an agent is still using will disrupt whatever it was doing, exactly as it would from a terminal.
Worktrees the app didn’t create. If you keep a worktree you made yourself in
.claude/worktrees/, it will be hidden along with the assistant’s. Reveal it, then use Claim as
mine in its right-click menu — the app writes down the same note it would have written had it
created the worktree, and the row stays listed from then on, including after a restart. Nothing on
disk changes: no branch is touched, no file is moved, and uncommitted work in the worktree is left
exactly as it was. Claiming the same worktree twice does nothing the second time, and it works
whatever the worktree is called — including names that look like the assistant’s own.
There is no undo, on purpose: un-claiming would hide the very row you used to do it, so the row would disappear mid-click. A note goes away when the worktree does — delete the worktree, or forget the project, and nothing is left behind.
Worktrees kept anywhere else on disk are never hidden on these grounds; see Including a worktree that already exists if you have one.
What happened at the upgrade. The first time this version opens a project, it looks for worktrees you demonstrably worked in — ones you had renamed, or that hold a session the app remembers — and adopts those, so they stay listed without your doing anything. That pass runs once per project. Anything it couldn’t find evidence for is hidden, and Claim as mine brings back any it missed.
If the app can’t read what it saved for a project, nothing is hidden on these grounds: every
worktree in the folder is listed, without agent chips and without a number beside the switch,
because the app genuinely doesn’t know which ones are yours. It also stops saving that project’s
notes for as long as the file stays unreadable, rather than replacing it with an empty one — so a
passing glitch can’t quietly erase what it knew. The file is left untouched for you to inspect or
delete; once it reads cleanly again, everything resumes as before.
Resizing and hiding the sidebar
- Resize: drag the thin handle on the sidebar’s right edge to make it wider or narrower.
- Hide: click the hide button (panel-collapse icon) in the sidebar header, next to add worktree. The sidebar collapses to a thin strip.
- Hiding takes the header with it, so the refresh button is unavailable until you show the sidebar again; the collapsed strip hosts only the show button.
- Show: click the show button (panel-open icon) on the collapsed strip to bring it back.
The “Default” entry: sessions without a worktree
Above your worktrees, the sidebar always shows one Default entry — even before you’ve created any worktree at all. Starting a session from it runs directly in your project’s own root directory (whatever branch you currently have checked out there), instead of inside an isolated worktree.
Use it for work that doesn’t need its own branch: quick one-off commands, inspecting or running the project exactly as it’s currently checked out, or anything you deliberately don’t want isolated into a throwaway worktree. Creating a worktree first, just to run a quick command, is unnecessary overhead this avoids.
- The Default entry is not a worktree — it has its own icon (a house) rather than the worktree iconography, so it’s never mistaken for one, and it has no type/issue/status tags and no right-click menu (no rename, delete, or copy-name — those are worktree-only actions).
- Starting a session from it never creates, modifies, or removes a worktree or branch.
- It supports the same session actions as a worktree — start, switch, close, and it persists and restores across restarts exactly like a worktree-bound session (see Starting, switching, and closing sessions below, which applies equally here).
- You can run multiple concurrent sessions from the Default entry, the same as a worktree.
- Because every Default session shares your project’s single checkout, actions that change the working tree (like switching branches from within one Default session’s terminal) are visible to every other Default session too — this is expected, not a bug, since there’s no worktree isolating them from each other.
- The Default entry is never hidden by the sidebar’s tag filters — since it isn’t a worktree, filtering by branch-derived tags doesn’t apply to it; it always stays visible.
- Hover any sidebar entry to see a tooltip describing it. For the Default entry that is its location — the project root itself. For a worktree the tooltip leads with the worktree’s full name, then gives its location relative to the project. The sidebar is narrow, so a long name is shortened with an ellipsis in the row itself; hovering is how you read the whole of it, and how you confirm exactly where a session is about to run before you start it. The tooltip opens below the entry, or above it for an entry at the bottom of the window, so it never hides the entry you are pointing at or the actions on it.
- A worktree’s tooltip also names the two things its row label cannot show, each on its own line: the branch it is bound to, and — when it differs from the displayed name — the folder on disk. Both are absent from the row because the displayed name is derived by stripping the type token and the ticket out of the folder name, which is what makes it readable and also what makes it unusable as a path or a branch to type.
- A row that is flagged explains itself on hover. A worktree whose directory is gone, or whose
directory git does not recognise, adds a Status line reading
missingorinvalid— the same word as the chip on the row. A worktree you added from outside this app’s own.claude/worktrees/folder marks its location(outside this app), which is why that one path is absolute where the others are relative. A healthy worktree says nothing about its status, so the rows that do have something to say are the ones that stand out.
Creating a worktree
Click add in the sidebar header to open the New worktree form. At the top, three chips choose where the worktree’s branch comes from:
- New branch (the default) — describe the work and the app derives a fresh branch name.
- Existing branch — pick a branch that already exists. See Working from an existing branch below.
- GitHub issue — pick one of the repository’s open GitHub issues, and its number and title fill in the ticket and the name. See From a GitHub issue below.
Creating a new branch
With New branch selected:
- Type — a select control: click it to open a list of every Conventional-Commits type
(
feat,fix,chore,docs, …), then click one to choose it. The control always shows the currently chosen type when closed, and marks it in the list when reopened. - Ticket — optional reference (e.g.
ABC-123). Leave blank to omit it. - Name — a short description (e.g.
login page).
The form shows the derived names before you create:
- Directory:
.claude/worktrees/${type}-${ticket}_${name} - Branch:
${type}/${ticket}_${name}
For example, feat + ABC-123 + Login page creates the branch feat/abc-123_login-page and a
worktree at .claude/worktrees/feat-abc-123_login-page. With no ticket, chore + cleanup gives
chore/cleanup — no _ anywhere. Illegal characters in the ticket or name are automatically
simplified (slugified), so #123 is a perfectly good ticket; it shows up as a #123 tag in the
sidebar.
The _ separates the ticket from the description, and it is on the branch as well as the folder.
That is what lets the app read the ticket back later: delete a worktree and re-create it from the
branch and the tag comes back, instead of the app having to guess where the ticket ended.
Creating a worktree makes the new git branch and worktree for you — no manual git commands. If the derived name collides with a branch that already exists, the app asks what you want to do rather than refusing — see Working from an existing branch. If the worktree folder already exists, creation is blocked with a message that names the folder and tells you to pick a different name or remove that folder — no branch choice can resolve it, so there is only the one answer. You get the same sentence whether the app catches the clash while you are filling the form in or only when it tries to create. If anything fails partway, the app rolls back so no half-created branch or directory is left behind.
If the project uses git submodules, they’re fetched automatically as part of creating the
worktree — including submodules nested inside other submodules — so the new worktree is ready to
use immediately, with no extra git submodule commands to run yourself. Projects without
submodules are unaffected. While a worktree is being created, the form shows a progress bar
alongside a short description of what’s currently happening. That description names the step for
what you actually chose — “Checking out existing branch” when you reused one, “Replacing branch and
creating worktree” when you overwrote one, “Creating tracking branch and worktree” when you
continued from a remote, and “Creating branch and worktree” for an ordinary new branch — followed by
“Setting up submodules” where they apply — the description only
ever names a step that’s actually part of this creation, so a repository without submodules never
shows a submodule-related step. This can take a little longer than usual for a repository with
submodules to fetch, so seeing the description change (rather than a single static message) is
expected, not a sign the app is stuck. If creation fails, the progress bar stops and the
description stays on the step where it failed, next to the error message.
If fetching a submodule fails (for example, a network problem or a private submodule remote you aren’t authenticated against), the worktree is not created — the branch and directory are rolled back the same way any other creation failure is, and the error names the submodule that failed and why, so you can fix the problem and try again.
While a worktree is being created, clicking outside the form or pressing Escape does nothing: the form stays open with its progress showing, so a stray click can’t hide how the creation went. To leave the form before it finishes, press Cancel. Cancel closes the form but does not stop the creation, which carries on in the background. When it finishes, a notification tells you the outcome: the name of the new worktree, or the error and the step where it failed.
Naming formats are fixed in this version and are intended to become configurable later.
From a GitHub issue
With GitHub issue selected, the form lists the repository’s open issues. Pick one and its number becomes the Ticket and its title becomes the Name. Everything else works as for a new branch: the same preview, the same create, the same prompt when the branch name is already taken. The issue’s labels choose the Type (see below); you can change it before you create.
What you need. The app reads issues through the GitHub CLI, gh, so install it from
cli.github.com and sign in once with gh auth login in a terminal. The app
looks for gh on the PATH your environment-include script sets up (Settings → Environment), then
on the app’s own PATH, then in the usual install folders. Issues are read as you: a private
repository works when your gh sign-in can see it, and an anonymous read is never attempted.
Which repository. The chip reads the repository behind the origin remote when it is on
github.com, otherwise the first github.com remote in the repository’s configuration. Only
github.com is supported. A remote whose address is rewritten by git’s url.<base>.insteadOf setting
is read as written in the configuration, so an alias that only becomes a github.com address after
rewriting is not recognised. When no github.com remote is found, the chip is disabled and the line
under the chips says why: “This repository has no GitHub remote.” or “Couldn’t read this
repository’s remotes: …”.
What is sent to GitHub, and when. Opening the form contacts nothing but the app’s own session service. Before you choose the chip, the line under the chips names the repository it would read: “GitHub issue reads open issues of owner/name from GitHub.” Only choosing the chip, or pressing Retry after a failure, asks GitHub for the repository’s open issues. The request carries the repository’s owner and name and nothing else from your project. When more than 1,000 issues are open, typing in Issue also searches GitHub (see below); that request carries the text you typed as well. The same notice stays at the top of the issue list while the source is chosen.
The list. Issues are listed most recently updated first. Each takes two lines: its number and
title, then who reported it and its labels. Long text wraps onto further lines instead of being cut
off, and ghost stands for a reporter whose account has been deleted.
Type in Issue to narrow the list by number, by a word of the title, or by a label, and use the
arrow keys and Enter to pick without leaving the field. The list follows the highlight as you move
with Up and Down, so the highlighted issue is always fully visible, however many lines it takes;
an issue taller than the whole list shows from its top.
The search runs over the loaded issues, on
your machine. A pick replaces whatever was in the ticket and name, including an earlier pick, and both
fields stay editable afterwards. At most 1,000 issues are loaded. When the repository has more, a
line under the list says “Showing the 1,000 most recently updated of N open issues — search also
looks on GitHub.” While the
list loads, you can switch back to another chip or fill the fields in yourself. A repository with no
open issues says “owner/name has no open issues.”
When the issues can’t be read. The list shows what went wrong and a Retry button:
| Message | What to do |
|---|---|
“Couldn’t read issues: the GitHub CLI (gh) isn’t installed. …” | Install gh, sign in with gh auth login, then retry. |
| “Couldn’t read issues: you’re not signed in to GitHub. …” | Run gh auth login in a terminal, then retry. |
| “Couldn’t read issues: your GitHub sign-in can’t access owner/name.” | Sign in with an account that can see the repository, or ask for access. |
| “Couldn’t reach GitHub. Check your connection, then retry.” | Check the network connection, then retry. |
| “GitHub’s rate limit was reached. Wait a minute, then retry.” | Wait a minute, then retry. |
| “GitHub didn’t answer within 10 seconds.” | Retry. If it keeps happening, check gh works from a terminal. |
| “Couldn’t read issues: …” | Read the detail gh reported, then retry. |
The issue’s labels choose the type
Picking an issue also sets the Type from its labels, through one label-to-type mapping that applies to every project. Until you change it, the mapping is:
| Issue label | Type |
|---|---|
bug | fix |
enhancement | feat |
documentation | docs |
GitHub’s other stock labels, such as question or good first issue, choose no type. Labels match
whatever their letter case, so Bug counts as bug. When an issue carries several mapped labels,
the entry listed first in the mapping wins: an issue labelled both enhancement and bug becomes
a fix. Each row in the list shows the issue’s labels, so you can tell which type a pick will give.
A pick replaces the type you had selected. When none of the issue’s labels is in the mapping, the
pick clears the type, and the form asks you to choose one before it creates the worktree. Either
way, the Type stays yours to change afterwards. The mapping is read at the moment you pick, so
changing it later does not change the type of an issue you already picked. It is kept in the app’s
settings.json, together with your other settings, and holds only labels and types, never anything
from an issue.
To add your own labels, change a type, reorder entries or restore the defaults, use Settings → GitHub issues (see GitHub issues).
Searching beyond the 1,000 loaded issues
When the repository has more open issues than the 1,000 the form loads, what you type in Issue
is also sent to GitHub’s search, so an older issue can still be found — by its number (4312 or
#4312), a word of its title, or a label. The loaded matches show at once, as always. Once you stop
typing for a moment (0.3 seconds), “Searching GitHub…” appears under the list, and the open issues
GitHub finds join the loaded ones. Each issue is listed once, and pull requests and closed issues
never appear. An issue GitHub matched only in its description or comments is left out, because
nothing in its row shows why it matched. Pick a found issue like any other.
Each keystroke replaces the previous search, so only the answer for what is typed now is used. When every open issue is already loaded, nothing is sent: the search stays on your machine.
If the search fails, the loaded matches stay, and the line under the list says “Search beyond the loaded issues failed —” followed by one of the reasons above, with a Retry button that runs the same search again. GitHub allows about 30 searches a minute; if you hit that, wait a minute, then retry.
Working from an existing branch
Work doesn’t always start in this app. You might have begun a branch in a terminal, pushed one from another machine, or been handed one by a colleague. Either route below brings it into a worktree without leaving the app.
Picking the branch from a list
Choose the Existing branch chip in the New worktree form and search for the branch you want. The field lists every branch until you type; from the first character on, it narrows to the branches that match, and the characters you matched are picked out in colour inside each row — so you can see why a branch is in the list, not just that it is.
You don’t have to type the name exactly. Three kinds of search work, in this order of confidence:
| What you type | What it finds | Example |
|---|---|---|
| Text that is really in the name | The branches containing it | report → feat/reporting-dashboard |
| The letters in order, with gaps | Branches you’re abbreviating | frep → feat/reporting |
| The name with one letter wrong, missing or extra | Branches you mistyped | reportng → feat/reporting |
Exact matches are always listed above approximate ones, so the branch you meant stays at the top. The emphasis shows which kind of match you got: a solid run of colour means the text was really there, and scattered letters mean you abbreviated.
Approximate matching needs something to go on, so it starts at three characters — one or two letters find only what literally contains them. Typo tolerance starts at five, because below that one wrong letter is too large a share of what you typed to tell a mistake from a different branch.
Use ↑ and ↓ to move through the results and Enter to take the one you’re on; Escape closes the list and leaves your search text alone. Everything else you type goes into the field, so searching never breaks stride. The ✕ at the end of the field clears the search in one action.
Each row shows the branch name and, for a branch that only exists on a remote, which remote it came from:
| Row | Meaning |
|---|---|
feat/login | A local branch, ready to use. |
feat/reporting · origin | Exists on origin, not yet on this machine. |
feat/login · in use by feat-login | Already checked out in that worktree — not available. |
feat/login · in use by a hidden agent worktree | Held by an agent worktree, which the sidebar hides by default. |
fix/olx · in use outside this app | Held by a worktree the app doesn’t manage — see below. |
main · in use by the project checkout | The project’s own current branch — not available. |
A branch that is in use elsewhere stays in the list — dimmed, and not selectable. It is shown rather than hidden so you can read where it is in use instead of wondering why it is missing.
If nothing matches what you typed, the list says so. Clear the field or shorten your search to see everything again.
The worktree folder is derived from the branch name — feat/abc-123_login becomes
.claude/worktrees/feat-abc-123_login — and the form shows it before you create. A branch this app
created keeps its ticket through the trip, so the worktree comes back with the same ABC-123 tag it
had before. A branch without a _ gets no ticket tag; the app does not guess one.
Remote branches reflect your last fetch. The app never contacts a remote here; it reads only what’s already in your repository. Run
git fetchyourself first if you want the list to be current.
When the name you typed is already taken
If you’re creating a new branch and the derived name already exists, the form asks what to do instead of refusing:
- Reuse branch — create the worktree on the existing branch, with all of its commits intact. This is what you want to continue work started elsewhere.
- Overwrite… — discard that branch and start again from the current checkout. Asks for a second confirmation first, because it destroys commits.
- Cancel — change nothing. Your form entries are kept, so you can adjust and try again.
If the branch exists only on a remote, the choices are Continue from <remote> (creates a
local branch at the remote branch’s tip and tracks it, so your next push goes back to the right
place) or Start fresh (an ordinary new branch at the current checkout, which will diverge
from the remote branch of the same name).
Overwrite cannot be undone from the app. The old commits are no longer reachable from that branch. Git’s reflog may still hold them for a while, but recovering from it is a manual git operation the app does not offer — treat overwrite as permanent.
When a branch can’t be used
A branch that is already checked out somewhere can’t back a second worktree — git allows a branch in only one place at a time. The app says so and identifies where it is. Neither reuse nor overwrite is offered: open that location to continue there, or pick a different branch.
Where it is can be one of four places, and the message tells you which:
- Another of your worktrees — named by its folder, which is its row in the sidebar.
- The project’s own checkout — the branch the project directory itself is on.
- A hidden agent worktree — one of the app’s own, but not currently listed. Turn on Show agent worktrees in the sidebar to see it.
- A worktree outside this app — one git knows about that this app doesn’t manage: another
tool’s worktree directory (
.git-paw/worktrees/…and the like), or a checkout in some unrelated folder. These never appear in the sidebar however you filter, so the message gives the full path instead of a folder name.git worktree listin the project directory shows all of them.
That last case is worth knowing about if a branch looks perfectly ordinary and is refused anyway.
It usually means a worktree you created outside the app — or a tool you used before this one —
still holds it. Removing that worktree (git worktree remove <path>) releases the branch.
Including a worktree that already exists
For that last case there is a better answer than deleting anything: Include that worktree, the button the message offers. The work is already there, in a worktree you or another tool created — including it simply tells the app to show it too, exactly where it is.
What it does not do matters as much as what it does:
- Nothing is moved, copied, renamed, or re-registered. The worktree stays where it is, and the tool that created it goes on finding it there.
- No git command runs at all. The branch, its commits, and the repository are untouched.
- The branch is still checked out in that worktree, so it still can’t back a second one. What changes is that you can now work in the one that holds it, from here.
An included worktree behaves like any other: it appears in the sidebar, hosts sessions, and can be renamed or deleted. Two things mark it out. Its row carries an outside this app tag, and hovering it shows the full path — a folder name alone wouldn’t tell you where a worktree the app didn’t create actually lives. And if its folder name happens to match one of the app’s own worktrees, the app shows it under a qualified name rather than renaming anything on disk.
Inclusion is remembered per project, across restarts, and is reversible: right-click the row and choose Stop showing. That removes it from the sidebar and leaves it completely untouched on disk — it is the opposite of Delete, not a milder version of it. Deleting an included worktree is still possible, and its confirmation names the full path it is about to remove, precisely because that path is somewhere the app didn’t put it.
One case inclusion does not cover: a folder under .claude/worktrees/ that git has forgotten
about. That is already listed, marked invalid, and no branch is held for it — so it never produces
the refusal above. Repairing one is a git worktree repair job, outside the app.
Managing a worktree (right-click)
Right-click a worktree in the sidebar to open its context menu:
- Copy name — copies the worktree’s displayed name to the system clipboard, so it can be pasted into any other application (browser, chat, terminal, etc.). Useful because the sidebar label itself isn’t a text field you can select from directly.
- Rename — changes only the name shown for the worktree in the sidebar. It does not rename the folder on disk or the git branch, and the type/issue tags are unaffected (they keep deriving from the folder name). The custom name is remembered across app restarts. Clearing it is not needed — just rename again.
- Stop showing — only on a worktree you included (see Including a worktree that already exists). Removes the row from the sidebar and changes nothing on disk: the worktree, its branch, and its files are exactly as they were. Include it again at any time.
- Delete — removes the worktree completely. A confirmation dialog first spells out exactly
what will be removed: the worktree directory under
.claude/worktrees/and all of its sessions — this part is unconditional. (For an included worktree the dialog gives its full path instead, and says it is one outside the app, because that is where the deletion lands.) If the worktree has an associated git branch, the dialog also offers an “Also delete the branch” checkbox, checked by default so confirming without changing anything behaves exactly as before (the branch is deleted along with everything else). Uncheck it to keep the branch — the directory and sessions are still removed, but the branch remains an ordinary branch in the repository, usable later (for example, to create a new worktree from it). Confirming terminates any running sessions in that worktree first, then removes the directory, sessions, and (unless unchecked) the branch — this cannot be undone. Cancelling removes nothing, including any change you made to the checkbox. (A worktree that is already missing/invalid can still be cleaned up this way.)
Starting, switching, and closing sessions
- Select a valid worktree and use its start session action to launch a session. It appears as a sub-item and its terminal opens on the right. Which AI CLI it runs is your default, or whatever you pick from the chevron beside that action — see Choosing which AI CLI a session runs.
- A worktree can host multiple concurrent sessions — start as many as you need for parallel, non-interfering tasks.
- Switch between sessions by selecting them in the sidebar. Background sessions keep running; only the displayed terminal changes.
- Right-click a session for Close and Remove:
- Close stops its AI CLI process and hides it from the sidebar. It does not reappear — including on a later restart, even though the underlying conversation itself still exists on disk in the CLI’s own storage. There is no way to bring a closed session back through the UI.
- Remove permanently deletes the session’s record, after a confirmation step. Unlike Close, there is no possible recovery path back into the sidebar either. Remove is only offered on a still-visible session — a closed session can’t be removed separately, since it’s already hidden.
Session labels come from the AI CLI itself (its own session title); until a title is available a placeholder is shown.
The name on a session row
You never type a session’s name. It is the AI CLI’s own name for the conversation, and the row picks it up as soon as the CLI has one — usually a few exchanges in, once there is enough of a conversation to name.
The name stays. Once a session has been named, that name is the row’s, whether or not anything is running: after you close the app, after the background service restarts, after a reboot. You do not have to open a session to find out which one it is — the list you come back to reads the same as the list you left, so you can pick the session you want by its name alone.
A conversation the CLI never named reads what you first typed in it. Claude Code does not name
every conversation. When it has not, the row shows the first thing you typed instead: your first
prompt, or for a skill or slash command the text you gave it (just the command’s name, such as
/speckit-autopilot, when you gave it none). It is shown on one line and cut at 80 characters with
“…”. Commands the CLI answers itself, like /model, are skipped, and so is anything the CLI or this
app inserted into the conversation. If the CLI names the conversation later, that name replaces
this label, and the label never comes back.
GitHub Copilot sessions follow the same rule. A Copilot session the CLI has not named yet shows the first thing you typed in it, and switches to Copilot’s own name for the conversation once it writes one. Text Copilot puts into the conversation itself — the context it loads for a skill, the instructions it discovers in the project, the prompts it writes to keep itself going — is not counted as something you typed.
A session from an older Copilot shows the summary it wrote. Copilot 1.0.36 and earlier recorded its name for a conversation as a summary rather than a name. That summary is Copilot’s own name for the session, so the row shows it, exactly as it shows a newer Copilot’s name — and in preference to the first thing you typed.
“New session” means nothing has been typed in the conversation yet, not that the app hasn’t finished loading. A session you created and never talked to reads “New session” for as long as that is true. It does not wait around unnamed, though: with no conversation in it there is nothing to come back to, so the next time the project is opened while nothing is running it, the row is tidied away. A session that was named, or that shows what you typed, keeps its row, even if the CLI later clears out that conversation’s records.
The newest name wins. If the conversation moves on and the CLI re-titles it, the row follows, and that newer name is the one that comes back next time. Names are per session: re-titling one never touches another.
A name you chose in the CLI yourself is the one that sticks. Rename a conversation in Claude
Code — /rename — and that is the name the row reads whenever the app looks that conversation up in
the CLI’s records: the first time it meets it, after the background service restarts, or on another
machine. The name the CLI had generated before your rename does not come back, and the CLI’s own
later titles do not replace it either — your name is the conversation’s name until you change it
again.
A row that was already showing the pre-rename name is corrected the next time you open that session. A name the app has already recorded is never looked up again (that is what keeps names stable), so a row that picked up the CLI-generated name before this was fixed keeps showing it. Open that session once and the row takes the name the CLI is displaying, which is yours.
Sessions from before this was true get their names back. If you have sessions that were showing “New session” even though you had talked in them, opening the project is enough — each one is looked up in its own CLI’s records, once, and keeps the name it finds, or failing a name, the first thing you typed. A session whose conversation the CLI no longer has keeps what it was already showing; nothing takes a name or a label away.
A session you are working in right now is no different. Type your first prompt into a session the CLI has not named, and within a minute its row reads that prompt — you do not have to reopen the project, restart anything or switch away and back. It makes no difference whether the CLI starts working before or after it tells the app that you typed; either way the row catches up on its own. And when the CLI names the conversation later, the row switches to that name while you watch, the same as it would after a restart.
Choosing which AI CLI a session runs
A session runs one AI coding CLI — Claude Code, GitHub Copilot or Pi Coding Agent — and which one is decided when the session is created.
- Press the start-session action and you get the CLI set as your Default AI CLI, in one press, exactly as before.
- Press the small chevron beside it to pick a different CLI for this session only. Your default is not changed.
- If only one CLI is installed, the chevron is not there at all. There is nothing to choose between, so the affordance is the plain button it always was.
- Only CLIs you actually have installed are ever offered.
- Each row offers what its own project or worktree provides. A row is answered for the
directory a session started from it would run in, including what
the environment a session starts in adds
there. So if one project’s environment-include script puts
pion thePATHand another’s does not, the chevron is on the first project’s rows and not on the second’s. Opening Settings, reconnecting to the session service, or opening another row’s list never changes what a row offers. Until a row’s own answer arrives — for a moment after a project opens — it offers what your home directory has. - A list of two or more says what it leaves out. When a row’s list offers two or more CLIs and another one is not available for that row’s directory, a note under the entries, below a divider, names the missing CLI, says why a session started there would not find it, and says what to change — for example that the environment-include script failed for that directory, and to fix the script named in “Script path”. The note is text, not an entry: pressing it does nothing. A row that offers every CLI has no note, and a row with one CLI has no chevron and is unchanged.
- Installed means installed where sessions run. With the session service directly on this
computer, that is your
PATH. With it in a container, it is the container’s image, and what is on your ownPATHmakes no difference. The image this app publishes, and one built from a checkout, ships all three. - If your default CLI is one a session would not find there, pressing start says so and offers the ones it would find instead of trying to run something that isn’t there. The message names the CLI, gives the reason for that row’s directory and what to change (the same reasons as the note under Default AI CLI), and the list opens. If the reason is not known yet, the message says only that a session would not find it there. Nothing is created until you pick — your default stays as you set it, and the list is checked at that moment, so a CLI you installed since opening the app is in it.
The choice is fixed for the session’s lifetime. There is no way to switch a running session to another CLI, and nothing switches it for you — not changing your default, not restarting the app, not restarting your machine. A session is a conversation with one tool, and each tool keeps its conversations in its own place.
Two sessions in the same worktree can run different CLIs at once. They do not interfere: each has its own process, its own terminal, its own conversation record, and its own title.
What the sidebar shows
Each session row carries a short text label naming its CLI — claude, copilot or pi. It is text, not
a colour or an icon alone, so it reads the same way for everyone and survives a narrow sidebar: if
the row runs out of room the title is what shortens, never the CLI label.
Open a session and its terminal bar names the CLI too — on the AI tab at the bottom-right, beside
its sparkle, reading claude, copilot or pi — so you can tell what you are talking to without going
back to the sidebar. It is there whichever pane the session is showing.
The busy/idle indicator works the same way for both CLIs — same shape, same states, no “less certain” variant for one of them.
Sessions you started outside this app
If you run claude, copilot or pi yourself in a worktree, this app finds that conversation the next
time you open the project and lists it as a session of that CLI. This happens on every open, not
just the first, so a conversation you start while the project is open shows up when you come back
to it.
Two things worth knowing about discovered sessions:
- A session you closed here stays closed. Closing writes a durable marker in the CLI’s own storage, so it is not re-listed later even if this app’s own records are lost.
- A discovered session shows no busy/idle indicator until you start it here. The app is not supervising it, so it makes no claim about what it is doing — it reads as unknown rather than guessing at idle. Select it and start it and it becomes an ordinary session, indicator included. (For Pi, the indicator also needs Show activity for Pi sessions on; with it off, a Pi session reads unknown by design.)
Sessions on Pi
Pick Pi Coding Agent from the chevron beside the start-session action, or set it as your
Default AI CLI. It is offered once pi is installed where sessions
run: on your PATH, or in the container’s image when the session service runs in one. The sidebar
and the terminal bar label its sessions pi.
A few things about a Pi session are worth knowing:
- Its conversation lives in Pi’s own store, not in this app — under
~/.pi/agent/sessions/, or under$PI_CODING_AGENT_DIRif you set it. The app never moves or copies it. That means it is yours outside the app too: runpi --resumein the same worktree and pick it, or passpi --session-id <id>, and you are in the same conversation the app shows. - It starts offline. The app launches
piwith its update check, version request and telemetry turned off (PI_OFFLINE=1,PI_SKIP_VERSION_CHECK=1,PI_TELEMETRY=0). If you set any of these yourself, your value is used. - Nothing in your Pi configuration is changed — not your settings, not your models, not your extensions.
- If the conversation was deleted from Pi’s store, resuming the session does not quietly start a new one: the terminal says Pi no longer has this conversation, and you can close the session or start a new one.
When a conversation is already in use
The app never runs two of its own sessions on one conversation: a session is its conversation, so opening one that is already running shows you the running one and starts nothing.
What it cannot know is whether you have the same conversation open in a pi you started
yourself. Where a CLI leaves a sign that a conversation is live, the app warns you before starting
and lets you go ahead — the warning is advice, not a lock, and it can be wrong in both directions.
Pi leaves no such sign, so on Pi that warning never appears. The app says nothing rather than
guess; if you do run the same conversation in two places at once, both write to it.
When a CLI isn’t installed
-
It is never offered — not in Settings, not in the per-session list.
-
Sessions that already run it are still listed and still labelled with it. They do not disappear and they are not relabelled as something else.
-
Settings tells you before you start anything. Under Default AI CLI, and under Image reference when sessions run in a container, a note names each CLI missing from where sessions run.
-
Starting one tells you why, and starts nothing. You get a clear failure rather than a terminal that never comes to life. The session’s pane and an error banner name the CLI, give the reason for the session’s directory and say what to change. The reasons are the six described under Default AI CLI: for example “Source a script before each session” is off, “Script path” is empty, or the startup script was not found, failed or timed out. What it says about installing depends on which:
- When the startup script was not found, failed or timed out, it does not mention installing: the fix is the script (“Script path”, or “Timeout”).
- When no script is sourced (“Source a script before each session” is off, or “Script path” is
empty), it says to turn that on or set it, and offers installing the CLI on the login
PATHas the alternative (in a container, using an image that puts the CLI on itsPATH). - When the script was applied, it says the CLI was not found on the
PATHsessions get. Only then is installing the first advice, with making the script add the CLI’s directory as the alternative.
In a container whose image lacks the CLI, it names the image and says to choose one that provides it.
- A new session is also offered another AI CLI.
- A restarted session is never pointed at another CLI: its conversation lives in that CLI’s own store, so it can only continue there. The message says to fix the cause and then restart the session.
-
Restart fails the same way until that is fixed. So the pane does not suggest restart for this failure, as it does after a crash loop. Once you have fixed the cause, or the service runs from an image that has the CLI, press restart in the bar. The service has to restart before a newly chosen image is used, as described under Session service.
-
The banner appears once per failure. Pressing restart again with nothing changed fails again without a second banner, and the bar’s
failedis what remains.
Reopening where you left off
The app remembers, per project, which session you had in front of you — and it remembers across restarts. Quit with a session open and reopen later, and that session is in front of you again, ready to type in, with no clicks.
- It comes back whether or not it was still running, and it comes back up. Sessions do not keep running while the app is closed, so the usual case is returning to a stopped one — and reopening resumes it, exactly as if you had clicked it in the sidebar. Arriving by reopening is not treated differently from arriving by clicking.
- One session is resumed, not several: the one you were looking at, in the project that opens. Other sessions in that project stay as they were, and a project you have not opened is untouched — its own last session waits until you switch to it.
- If the resume cannot happen — the project is open in another window, or its folder is unavailable
— the terminal says what is actually true of the session rather than looking as though it were
starting, and the
restartcontrol in the bar is there when you want it. - Each project remembers its own, so switching projects takes you to that project’s last session.
- If the session you were on has been closed, or its record has gone, the app opens the project as it otherwise would and leaves everything else alone. Closing a session does not wipe the memory — it just means there is nothing to return to.
- If its worktree was deleted outside the app, you still land on it, shown the way any session with a missing worktree is shown. You can see and select that session yourself, so the app returns you to it rather than pretending it is not there.
- Forgetting a project forgets which session it was on, along with everything else the app kept about it.
Finding the session you are on
The session the terminal is showing is the current session, and the sidebar always says which one that is:
- Its row is highlighted, and its name is set slightly heavier than the rows around it. The weight is there so the current session is still identifiable in a screenshot converted to greyscale, or by anyone who cannot separate the highlight from the hover shading beside it.
- The location holding it — a worktree, or Default — is opened for you, so the row is actually on screen rather than hidden inside a collapsed entry. This is what tells you where you are after switching projects, when every row would otherwise be collapsed.
You keep control of the panel:
- Collapsing that row closes it for good, for as long as you stay on the same session. It does not spring back open when a worktree is created or re-discovered in the background.
- Nothing else is opened or closed on your behalf. Other rows are left exactly as you had them.
- A row opened for you stays open when you move on to another session. Ceasing to be current takes away the highlight, never the open row.
- Selecting a session yourself highlights it and moves nothing — you were already looking at it.
- If the row would be below the fold in a project with many worktrees, the list scrolls just far enough to bring it into view. If it was already visible, the list does not move at all, and once you scroll the panel yourself nothing scrolls it back until you move to another session.
- After a fresh start, no session is current until you pick one or start one, and the sidebar says so by highlighting nothing.
The embedded terminal, resume & restart
- The terminal runs the session’s AI CLI with its working directory set to the session’s worktree, so each session is scoped to its own branch.
- Type in the input line and press Enter to send input to the CLI; its output streams above.
- If a session’s process exits unexpectedly, it is automatically restarted, resuming the prior
conversation — the app asks the CLI to resume the session id it owns, so you come back to the
same conversation rather than a fresh one. Repeated rapid failures stop the auto-restart and mark
the session failed so you can retry manually. The pane then says why it gave up and what the
last exit was — “Gave up after 3 restart attempts — last exit: exit status 1.” — beside the
restart control that resumes it, and the status bar under it reads
failed after 3 attempts. A window you open afterwards is shown both, so a loop that ran while you were away is not reduced to the word failed. - Closing the active project (or quitting the app) stops that project’s session processes but keeps the sessions; reopening the project restores them and resumes the same conversations. Switching to another project does not stop them — see below.
Requires the session’s CLI —
claude,copilotorpi— where sessions run: on yourPATH, or in the container’s image. If it is missing, starting the session reports which one could not be found — see When a CLI isn’t installed.
Switching to a regular terminal
Each session’s terminal can also run a plain shell instead of the AI CLI — useful for running git commands, scripts, or anything else scoped to that session’s worktree without leaving the app.
- The tab strip in the terminal’s bottom bar is how you move between the AI CLI (
claude,copilotorpi) and a plain shell: press the AI tab at the right-hand end to talk to the CLI, press a numbered tab to get a shell. The marked tab is the one the pane is showing, so the strip is the single place to check which process your keystrokes are going to — it names where each press takes you rather than just saying “the other one”. - The shell starts with its working directory set to the session’s worktree, same as the AI CLI —
so
git status, build scripts, and so on all run against the right branch. - Both processes keep running while you switch — leaving the AI tab never stops or restarts the CLI, and leaving a shell’s tab leaves that shell running in the background. Switching back reattaches to whichever process was already there, exactly as you left it.
- If the shell exits (you typed
exit, or it crashed), a restart control appears in the same bar so you can start a fresh one; unlike the AI CLI, the shell never restarts on its own. - Switching to a shell never stops, restarts, or otherwise touches your AI conversation — even mid-turn. It keeps running in the background exactly as it was, including its own crash-auto-restart if it happens to exit while you’re looking at the shell, and switching back reattaches to that same conversation with nothing lost.
Running more than one Regular Terminal instance
A session isn’t limited to a single Regular Terminal — you can open as many independent shell instances as you need, side by side.
- An open a new instance button — the “+” — sits in the bottom bar at the end of the numbered tabs. Press it (or use Ctrl+Shift+T / Cmd+Shift+T on macOS while the terminal has focus) to start another independent shell, scoped to the same session working directory as the first. The button is there even when only one instance is open, so you can always go from one to two.
- The keyboard shortcut only opens a new instance while the session is already showing a Regular Terminal — pressing it while the AI tab is marked does nothing and does not change tabs.
- Each instance is a fully separate shell process: running a long command in one never affects the others, and closing or restarting one instance never touches its siblings or your AI conversation.
- Each instance tracks its own running/exited state independently, including ones you’re not currently looking at — see the tab strip below, which is where that state is reported.
- Closing a background instance leaves everything else exactly as it was. Closing the instance you’re currently looking at automatically brings up the next one in the list (or the previous one, if you closed the last) — the pane is never left showing a closed instance. Closing your very last instance marks the AI tab.
- Coming back from the AI tab always returns you to whichever instance was last active — not an arbitrary one.
The tab strip
The bottom bar carries a tab strip of everything the session can show you: one numbered tab per open Regular Terminal instance, in the order you opened them, and then the AI conversation’s own tab at the right-hand end.
Exactly one tab is always marked, and it is the one whose content the pane is displaying — so the strip tells you where you are without your having to press anything. Click a tab to bring that pane to the front; whatever you switch away from keeps running untouched in the background.
The strip is always there, even in a session with one Regular Terminal or none at all. A brand-new session shows a single tab — the AI conversation’s — marked, because that is what you are looking at.
The AI conversation’s tab
It sits at the right-hand end and stays there as you open and close instances, so it is always one press away. Three things make it different from its neighbours, and all three are deliberate:
- It has no close button. A session has exactly one AI CLI process, and ending it is not something this control offers — by any press. Every instance tab has one; the AI tab keeps the space and leaves it empty, so all the tabs stay the same size and the strip still reads as a strip.
- Clicking it only switches the view. It never starts, stops or restarts anything — not the AI CLI, and not any terminal instance — and clicking it while you are already looking at the AI conversation does nothing at all. Switching away and back returns you to the same terminal instance you left.
- Its right-click menu is a terminal tab’s minus Close (see below).
What a right-click offers
Right-click any tab for what you can do to that process. On an instance tab that is Restart (offered only while that instance’s own shell is stopped) and Close; on the AI tab it is the same menu without Close. The menu acts on the tab you clicked, not on whichever pane you happen to be looking at.
If a right-click does nothing, that is the answer rather than a fault: the only thing the menu could have offered is a restart, the process is running, and an empty panel would say there is something to do here and then withhold it.
Which processes aren’t running
A tab whose process isn’t running wears a small red ring at its leading edge. It means “there is something you can do here” — right-click that tab and Restart will be waiting. It appears on the AI conversation’s tab in exactly the same place and for the same reason, so one glance along the strip tells you what is and isn’t running.
- It shows for a process that has stopped — exited, crashed, or never started — and not for one that is still starting up. A starting process is on its way and there is nothing to do to it; the mark would only send you to a right-click that does nothing.
- It is independent of which tab is selected, so a tab can be both the one you’re looking at and the one that isn’t running, and it says both.
- It appears on a background instance without your having to select it. If one exits or crashes while you’re viewing a different one, its tab gains the ring where you can see it — right-click and choose Restart to start a fresh shell for just that instance, without switching to it first, and without touching any sibling or your AI conversation.
When there are more tabs than fit
Past about five open instances the tabs need more width than the bar can give them. They scroll rather than shrink: turn the mouse wheel over the strip to move along it. No tab is ever made narrower, ellipsised or dropped, and the “+” and the AI tab keep their full size and position however many instances are open — the AI tab in particular stays one press away rather than being something you have to scroll to.
- A faded edge means there is more that way. When the tab you are looking at is the one out of sight, that edge takes the marked tab’s own accent colour instead — so the fade tells you not just that there is more, but which way the pane you are in has gone.
- Selecting a tab scrolls it into view, so you never end up looking at a pane whose tab you cannot see. If you then scroll away by hand, it stays where you put it.
Sessions in the background
Switching to a different project does not stop your sessions. When you change the active project — from the top-bar project switcher, the Known projects list, or the folder browser — the project you leave keeps all its sessions running in the background: their AI CLI processes stay alive and their output keeps accumulating while you are away.
When you switch back, the project’s sessions are still running and the session that was in the foreground is shown again, exactly as you left it (other sessions stay in the background). Any number of projects can hold running sessions at once.
If one of a background project’s sessions exits unexpectedly while you are away, it is auto-restarted under the same crash-loop guard as a foreground session. When you return to that project a short notice tells you a background session was restarted — the state never changes silently. Dismiss it with its Dismiss button.
Closing the window does not stop your work
Sessions run in a background service, not inside the window, so closing the last window leaves them running. An agent mid-task keeps working, and reopening the application re-attaches to it with the output that accumulated while you were gone.
That service does not run forever either. After 30 continuous minutes with nothing connected it stops itself, and reopening the application starts a fresh one. A session that was running when it stopped comes back resumable rather than lost: selecting it resumes the same conversation where it left off, and nothing is ever auto-resumed with nobody watching.
Nothing about this is a setting you have to find, and nothing needs installing to make it work — see the session service for what it does and does not promise, including what a reboot costs you.
Colored, real-terminal output
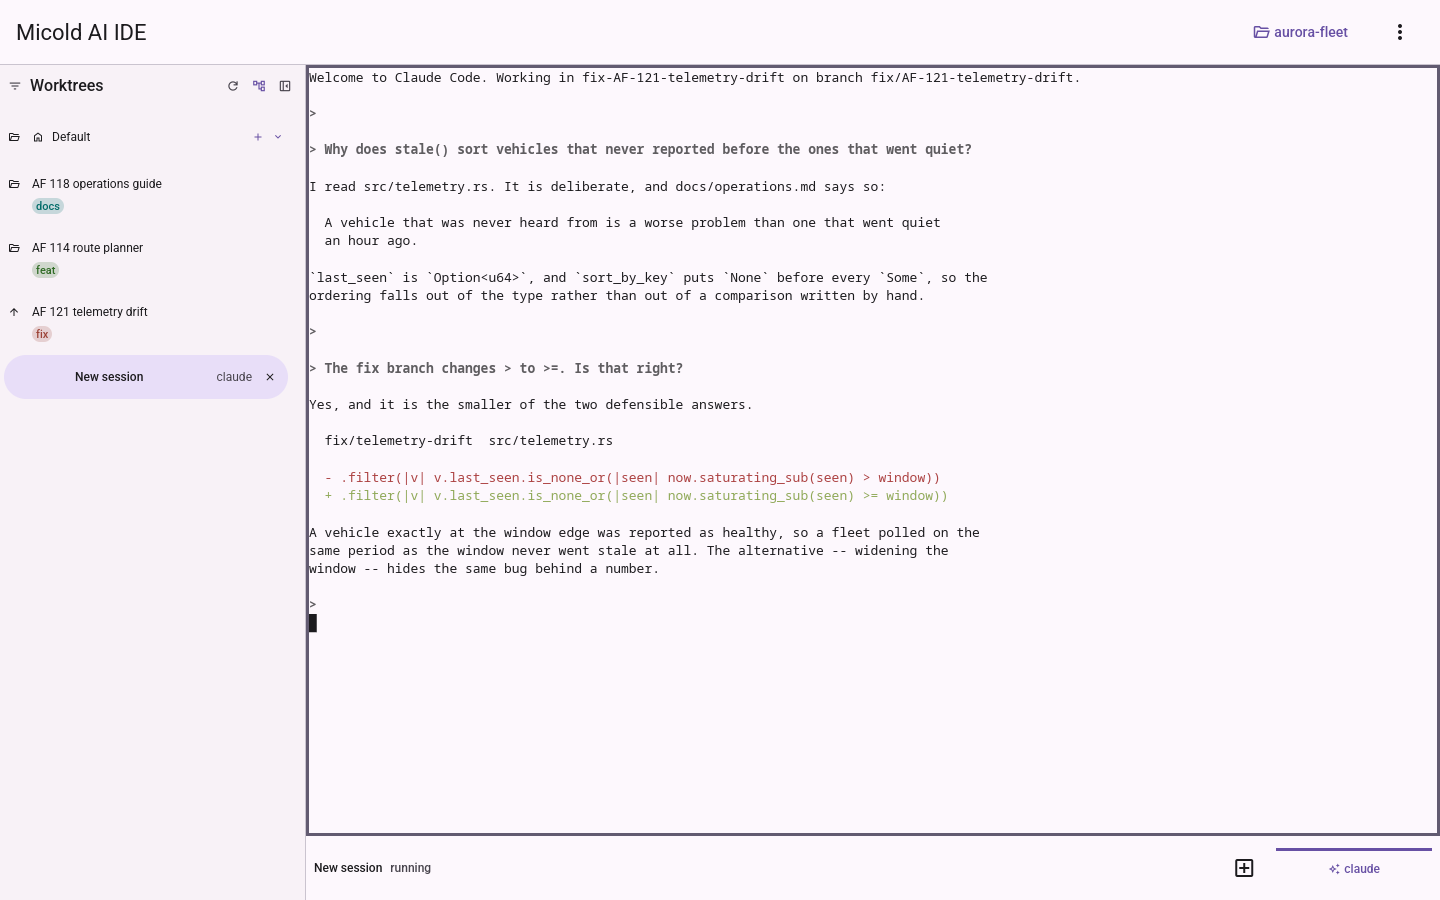
The embedded terminal renders the AI CLI’s output like a real terminal, not as flat text:
- Colors and styles — ANSI foreground/background colors (the standard 16, bright, 256-color, and 24-bit truecolor) and text styles (bold, dim, italic, underline, strikethrough, and reverse/inverse) appear the same as in a standalone terminal.
- Theme-aware defaults — when output specifies no explicit color, the terminal’s default
text and background follow the app’s light/dark theme and update when you switch themes. The 16
ANSI colors use a fixed conventional palette so programs look as their authors intended. A
program that asks the terminal whether its background is light or dark —
claudedoes — is told the current theme, but it asks when it starts: after switching themes, restart it to pick up colours that suit the new background. - Full-screen interfaces — the CLI’s interactive UI and other full-screen (alternate-screen) programs redraw cleanly, with the cursor shown at its current position.
- Focus — the terminal you are looking at is where the keyboard goes, unless you have handed it away or something that types has taken it (a colored border marks the focused terminal).
Interacting with the terminal
Start a session, or select one in the sidebar, and its terminal is focused right away — just type, no click needed. (You can also click the terminal to focus it, e.g. after releasing focus.) Keystrokes stream straight to the CLI as you press them, exactly like a standalone terminal:
- Everything reaches the CLI: printable characters, Enter, Backspace, Tab, arrow keys, Home/End/PageUp/PageDown, Insert/Delete, function keys, and control chords (Ctrl+C to interrupt, Ctrl+D, Ctrl+R, Ctrl+U, …). There is no “type a line and press Enter” box any more.
- Paste with the platform paste shortcut (Ctrl+Shift+V, or Cmd+V on macOS); the text is inserted into the CLI as input.
- Select text by dragging with the mouse (double-click selects a word, triple-click a line); the selection is copied to the clipboard automatically on release. Copy the current selection with Ctrl+Shift+C (Cmd+C on macOS); middle-click pastes. A plain click, without dragging, clears the selection and selects nothing, so it never replaces what is on the clipboard.
- Mouse-driven programs: when the running program turns on mouse reporting, mouse clicks are forwarded to it; hold Shift while dragging to select text instead.
- Keys route to the terminal’s process only while the terminal is focused. When focused, every key — including Escape and shortcuts the app would otherwise use — goes to it; when not focused, those keys drive the application instead. Input is only delivered while the session’s process is running (otherwise keystrokes are ignored and the header shows the session status).
- Leaving focus: press Ctrl+Shift+E (Cmd+Shift+E on macOS). Releasing focus never interrupts the running session. Clicking on empty app chrome no longer does it — see below. You rarely need this: going anywhere else in the application hands the keyboard over on its own, so the chord is for the times you want the app’s shortcuts back without leaving the terminal you are looking at.
Links
Web and mail addresses in a terminal are links, and so is text a program marked as a link.
- Hover over an address such as
https://example.com/docsormailto:team@example.comand it is underlined, exactly the address and not the punctuation around it. The full address it opens shows in a small label at the bottom-left of the terminal, or at the top-left while the pointer is near the bottom. An address the terminal wrapped onto the next row is one link. An address needs its scheme to be recognised:https://example.comis a link, a bareexample.comorteam@example.comis ordinary text. Addresses that would hand the click to another application —vscode://,slack://,javascript:,data:— are never links either. - Open it with Ctrl+click on Linux and Windows, or Cmd+click on macOS. The pointer
turns into a hand while you hold Ctrl (Cmd) over a link, to show a click will open it. A web
address opens in your default browser, a
mailto:address in your default mail client. - Selecting still works as before. A plain click, a drag, and a double or triple click select text even when they start on a link, and never open it.
- Right-click a link for Open Link and Copy Link Address, above the terminal’s own Copy and Paste. Both act on the link you right-clicked, even if the output has moved since. Copy Link Address copies the complete address — an address the terminal wrapped onto the next row as one line, and, for a link a program declared, the address it declared rather than the word you see. Over anything that is not a link the menu offers Copy and Paste alone.
- Programs that use the mouse (
vimwith:set mouse=a,htop, …) get Ctrl+clicks as they always did. Hold Shift as well, Shift+Ctrl+click (Shift+Cmd+click on macOS), to open a link there; the underline shows only while Shift is held. - Links a program declares. Some programs print a word such as
docsthat stands for an address. The whole word is marked as one link, and the label shows, and a click opens, the address the program declared, even when the visible text reads like another address. - Whether a program declares links is its own choice. micold does not announce that its
terminal shows declared links, and a session no longer inherits the identity of the terminal you
started micold from (
TERM_PROGRAM,FORCE_HYPERLINKand similar variables are removed), so a program cannot mistake micold for that terminal. To have programs that honour it, such as the AI CLIs, declare their links, addexport FORCE_HYPERLINK=1to the script micold sources before each session (see The environment a session starts in) and start a new session. - Long addresses from an AI CLI. An AI CLI that breaks its own lines to fit the terminal prints
a long address as several rows, so only the first row’s piece is a link and it opens a truncated
address. Check the label before you click; with
FORCE_HYPERLINK=1the CLI declares the whole address instead. - Files and folders on this computer. A
file://link — the kindls --hyperlink=alwaysprints — opens a document in the application set up for it, and a folder in your file manager. - A file your computer would run is shown, never run. A program, a script with its execute bit
set, an installer or a launcher (
.desktopand.AppImageon Linux, an app bundle,.commandor.pkgon macOS,.exe,.bat,.ps1,.msiand anything in%PATHEXT%on Windows) is revealed in your file manager with the file selected, so clicking a link can never start something. A folder is not a program, so it opens — except a macOS app or other bundle, which is shown. - A file on another machine is not a link.
file://otherhost/share/report.docxnames a file this computer does not have, so it is not underlined and a click does nothing. - A file that is not there. If the file has been moved or deleted since the program printed it,
nothing opens and a notification says
Couldn't open file:///home/you/notes.txt: the file doesn't exist on this machine. - Sessions in the sandbox. A session running in the sandbox prints the paths it sees inside the container, which are not this computer’s paths. A file in a folder the sandbox shares with your computer opens from the place on your computer that holds the same file: the label reads that path, and a click asks Open a file from the sandbox? naming it, because the sandboxed session could have written the file. Nothing opens until you answer.
- Paths the sandbox does not share are not reachable from your computer. Their labels read
/work/project/readme.txt — not reachable from this machine, and a click opens nothing rather than the wrong file: a notification saysCouldn't open file:///work/project/readme.txt: the sandbox doesn't share that location with this machine. - If the sandbox stops while the question is on screen, answering Open opens nothing and a
notification says
Couldn't open /home/you/project/readme.txt: the sandbox has stopped. - When it can’t open. If nothing on your computer is set up to open the address, or the
browser fails to start, a notification says so, for example
Couldn't open https://example.com/docs: no application is set up to open it.
One press does what you pressed
Every control in the window acts on the first press, whatever the terminal was holding. Press a tab and the pane switches to it; press a session in the sidebar and it opens; press a toolbar button and it fires. You never press something twice — once to get out of the terminal, once to actually use it.
What a press does to the keyboard depends only on what you pressed:
- Something that types — a text field, or a menu or dialog that opens on the press — takes the keyboard, and hands it back when it closes.
- Something that types nothing — an icon button, a toggle, a menu item that performs an action — leaves the keyboard exactly where it was. Press it while typing in the terminal and you carry straight on typing.
- Empty space, or a disabled control — changes nothing at all. Inert space is not a way out of the terminal; the release chord and the release control are.
The release control is always in the bottom bar, and greys out when the terminal does not hold the keyboard — it does not appear and disappear as you work.
While you are typing somewhere else
The terminal never takes the keyboard out from under you. A dialog, a menu, the project switcher, the sidebar’s filter panel or a text field holds it for as long as it is open, and hands it back when it closes — unless you had released the terminal first, in which case the keyboard stays with the application.
Nothing that happens on its own moves the keyboard: not terminal output, not a background session finishing its start-up, not a session changing state. Only you move it.
The terminal’s own right-click menu is the exception that proves the rule — it belongs to the pane, so opening it leaves the terminal holding the keyboard and you can carry on typing.
Landing on a session ready to type
Anything that puts a different terminal in front of you leaves that terminal holding the keyboard, so you can type straight away:
- selecting a session in the sidebar, or starting a new one;
- switching between AI CLI and Regular Terminal mode;
- opening, closing or switching a Regular Terminal instance;
- switching to a project whose session is restored;
- launching the app with a session restored from last time.
Going to a terminal on purpose also ends an earlier release — you asked for that terminal, so it gets the keyboard. (Releasing is about the moment, not something a session remembers.)
Leaving the app and coming back
Switching to another window and back changes nothing about where the keyboard is. If you were typing in a terminal, keep typing — no click. If you had released the terminal, it stays released and your app shortcuts keep working. If you were half-way through a dialog field, the caret is still in it.
Nothing is saved and restored here; there is simply nothing for leaving the window to change.
Pressing into the terminal
Pressing a terminal that does not hold the keyboard both gives it the keyboard and does what the press would have done anyway — placing the cursor, starting a selection, or reaching a mouse-driven program at the cell you pressed. No press is spent purely on focusing.
Sizing, resize & scrollback
- The terminal tells the CLI how many rows and columns are actually visible, so its interface lays out to fit. Resizing the window or dragging the sidebar reflows the terminal and the running interface to the new size.
- Scroll with the mouse wheel or a touchpad to move back through earlier output (up to the scrollback limit). Two-finger touchpad scrolling works the same as a wheel, including the fine, slow gestures that move less than a line at a time. When a full-screen program has taken over the mouse, the scroll is forwarded to it instead.
- A scrollbar appears on the right edge of the pane while you are scrolled back, showing where you are in the history. Drag it to move, or click the track to page. It hides itself once you return to the live bottom, so no scrollbar simply means there is nothing scrolled back.
The scrollback limit is configurable — see Settings.